How do I Allowlist a website from the extension proxy?


Two ways to allow ads on a specific site
Method 1 (inline / bottom-right allowlist button)
The Windscribe browser extension supports three Allowlist functions:
- Allow Connection
- Allow Ads
- Allow Privacy Settings
The Allow Connection option allows users to have specific domains go through their ISP connection rather than the extension's proxy. To do this, please perform the following:
- Access the domain that you wanted to have go through your ISP's connection
- Open the extension and click on the Allowlist settings button on the bottom right
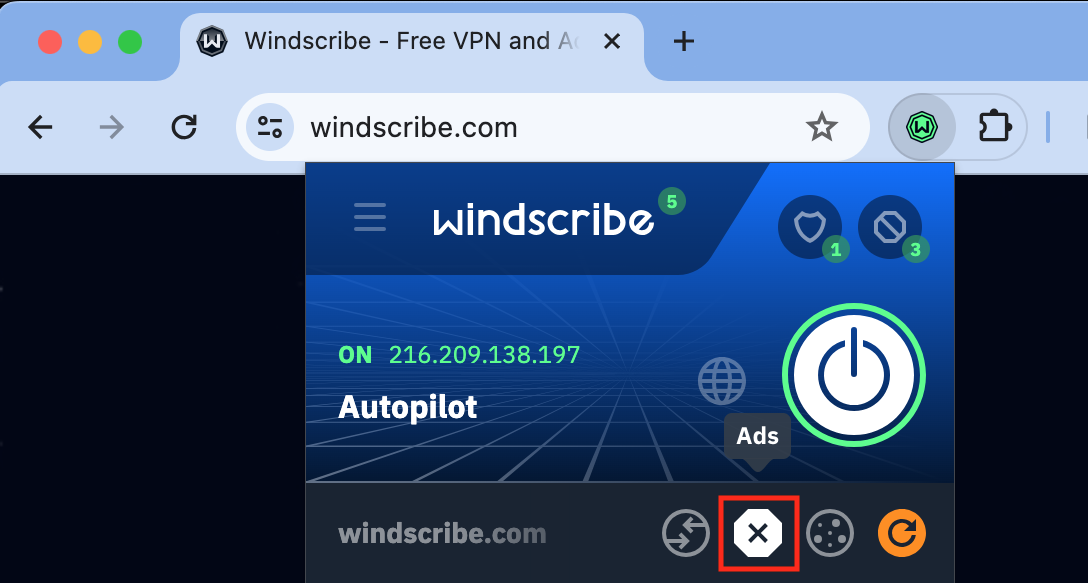
- Click on the Connection (arrows in circle) button and hit refresh (orange arrow icon)
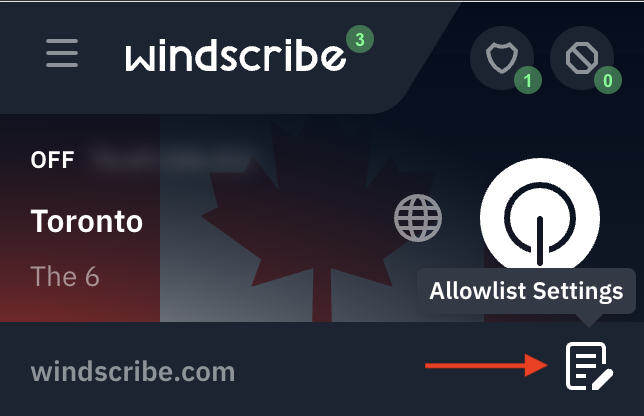

The Allow Ads option enables users to let advertisements come through the extension's proxy for specific websites. This function can be executed without having to disable the Ad Blocker function completely. To do so, please perform the following:
- Access the domain that you wanted to Allowlist for advertisements
- Open the extension and click on the Allowlist settings button on the bottom right
- Click on the Ads button (stop sign) and hit refresh

Finally, the Allow Privacy Settings function lets users to disable the Privacy Settings they've enabled for certain domains. To do so, please perform the following:
- Access the domain that you wanted to allow Privacy Settings for
- Open the extension and click on the Allowlist settings button on the bottom right
- Click on the Privacy Settings (shield) button and hit refresh

To confirm any of these changes, once you've refreshed you should see a green checkmark in the bottom right corner of the extension to let you know that your settings have been applied to the current domain you're visiting

Method 2 (Preferences path)
In order to disable the ad blocker function from the extension for a specific website, you need to Allowlist the domain using the Allow Ads function. There are two ways to go about this.
The first way is to manually add the domain to the extension:
- Once connected to the extension's proxy, go to the website in question
- Open the extension and click on the Preferences menu button on the top left
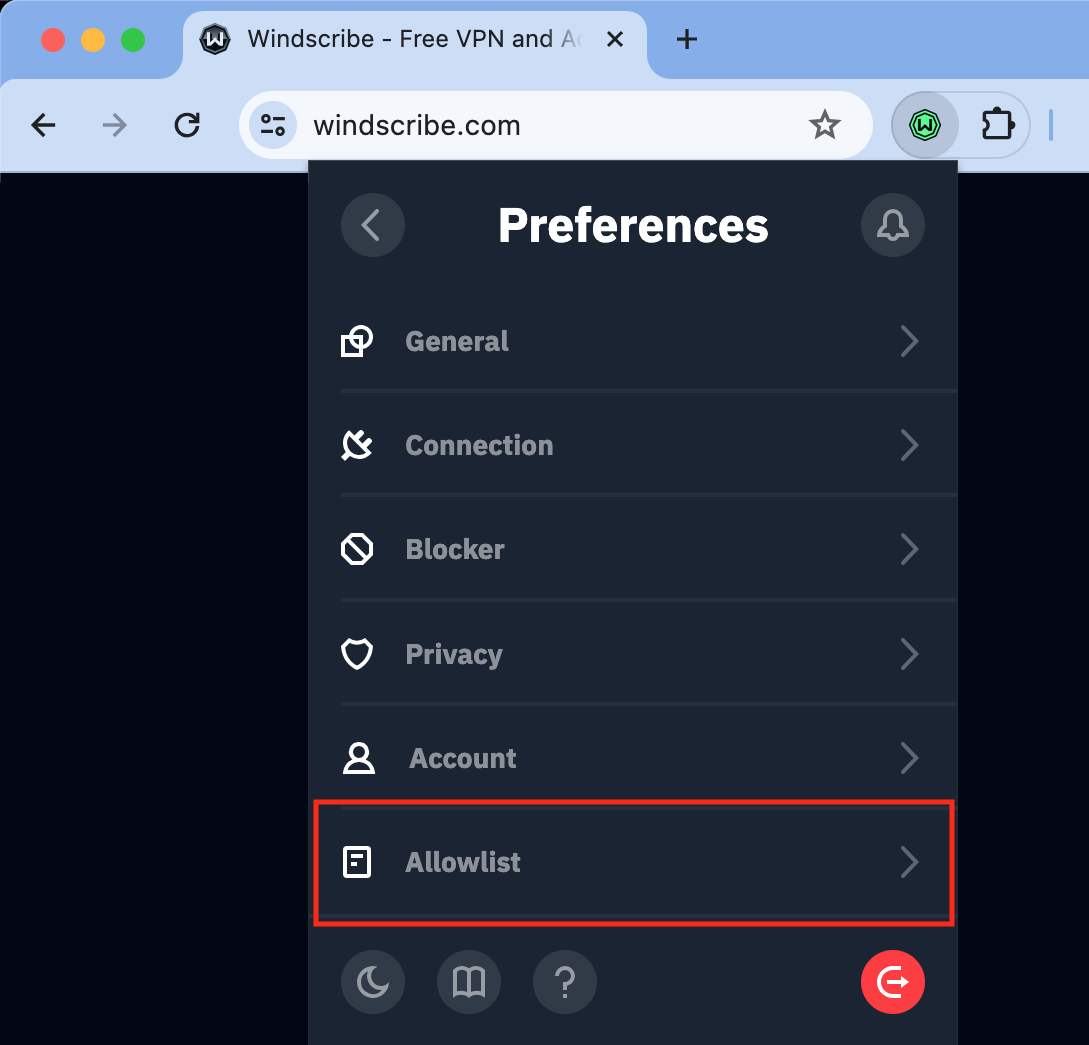
- Go to Allowlist in the Preferences menu
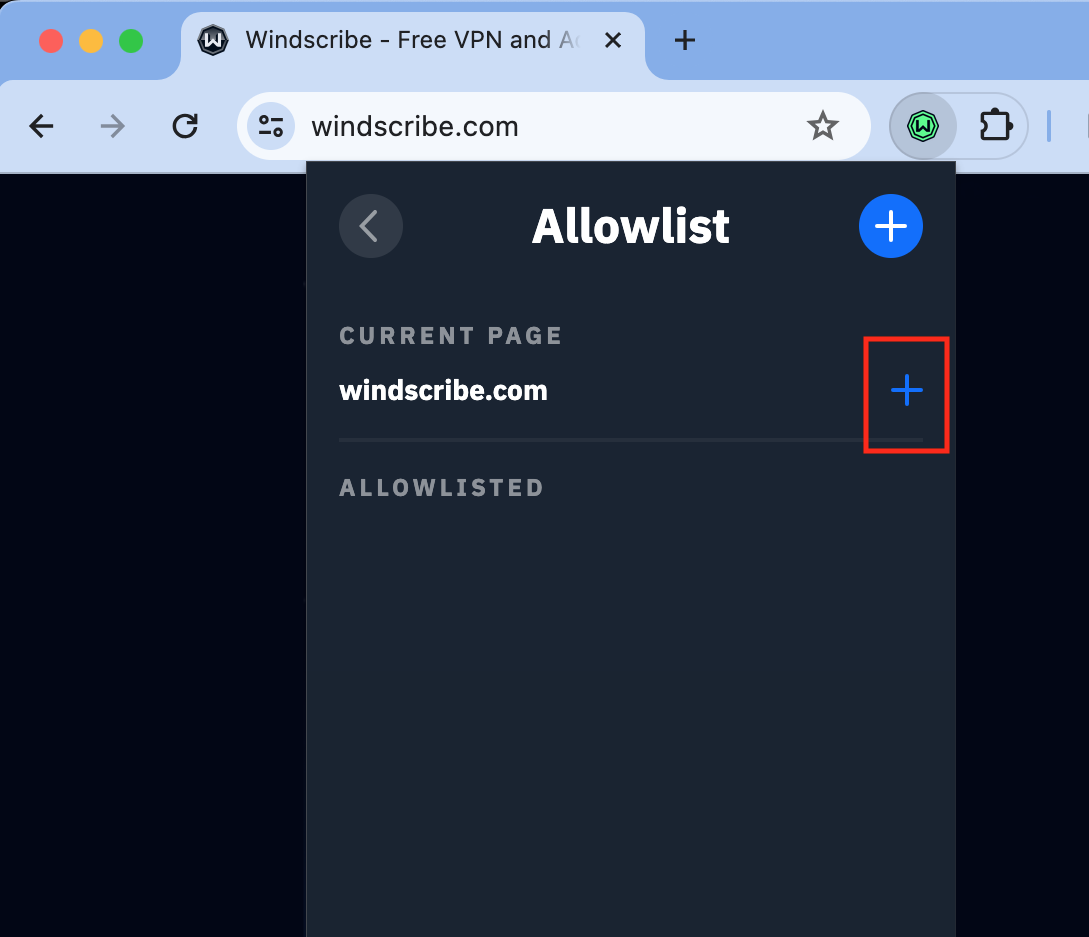
- Click on the + button on the right hand side of the domain
- Click on the check mark beside the Allow Ads option
- Click the Add button
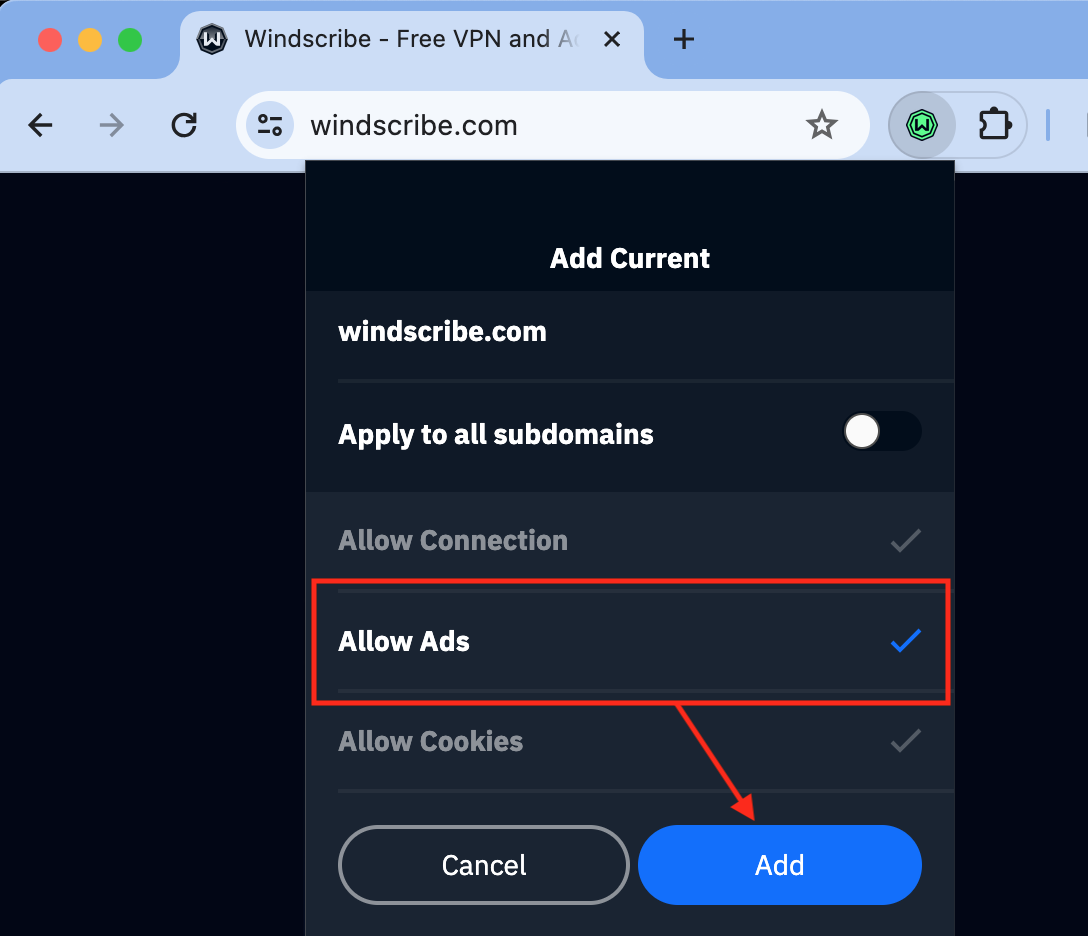
The other way to Allowlist specific domains for advertisements is through the main interface of the extension. After connecting and accessing the domain, open the extension and click on the Allowlist settings button located on the bottom right hand corner:
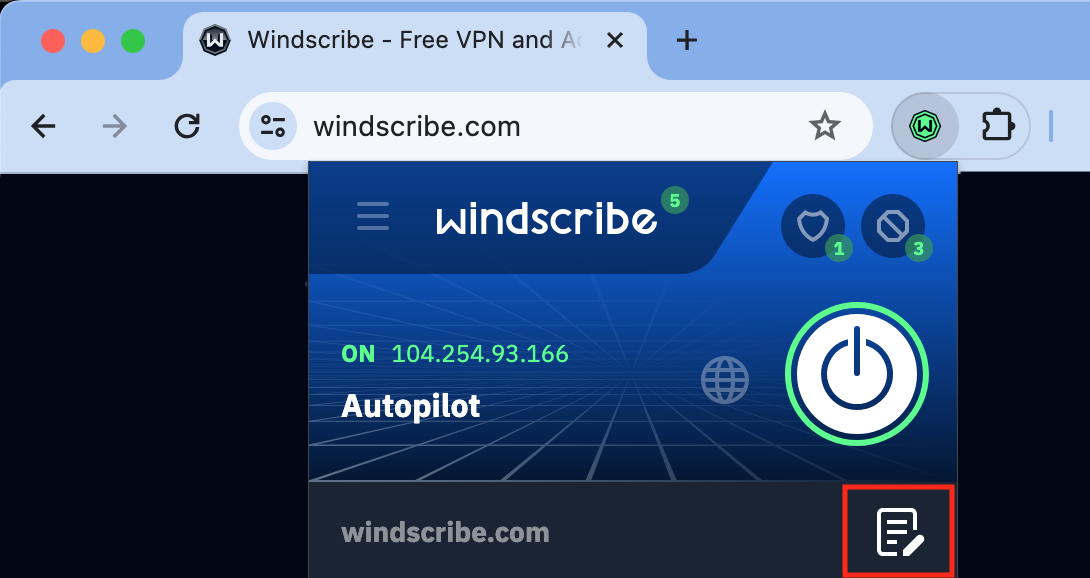
Then, click on the Ads button before hitting the refresh (orange arrow icon):