

How to Set Up & Use Windscribe on a Eero Mesh Router


Important: What eero Does & Does Not Support
eero routers run proprietary firmware and do not allow third-party VPN client installation. You cannot configure OpenVPN or WireGuard directly on any eero device.
To route most internet traffic from your eero mesh network through Windscribe, a VPN-capable gateway device must sit between your modem and the gateway eero, meaning the eero plugged into a GL.iNet LAN port. Local LAN traffic and anything explicitly bypassed on the GL.iNet router will not use the tunnel. This guide uses a GL.iNet router as that gateway: they are commonly available consumer routers that support WireGuard natively and require no firmware flashing.
Final network topology:
Modem → GL.iNet Router (Windscribe WireGuard active) → eero Gateway (Bridge Mode) → eero Nodes
Modem/router combos: If your ISP-supplied device is a combined modem and router (common with cable and fiber gateway boxes), put that device into bridge or passthrough mode if your ISP allows it. If you cannot, the topology still works, but you will have an additional NAT layer upstream of the GL.iNet router.
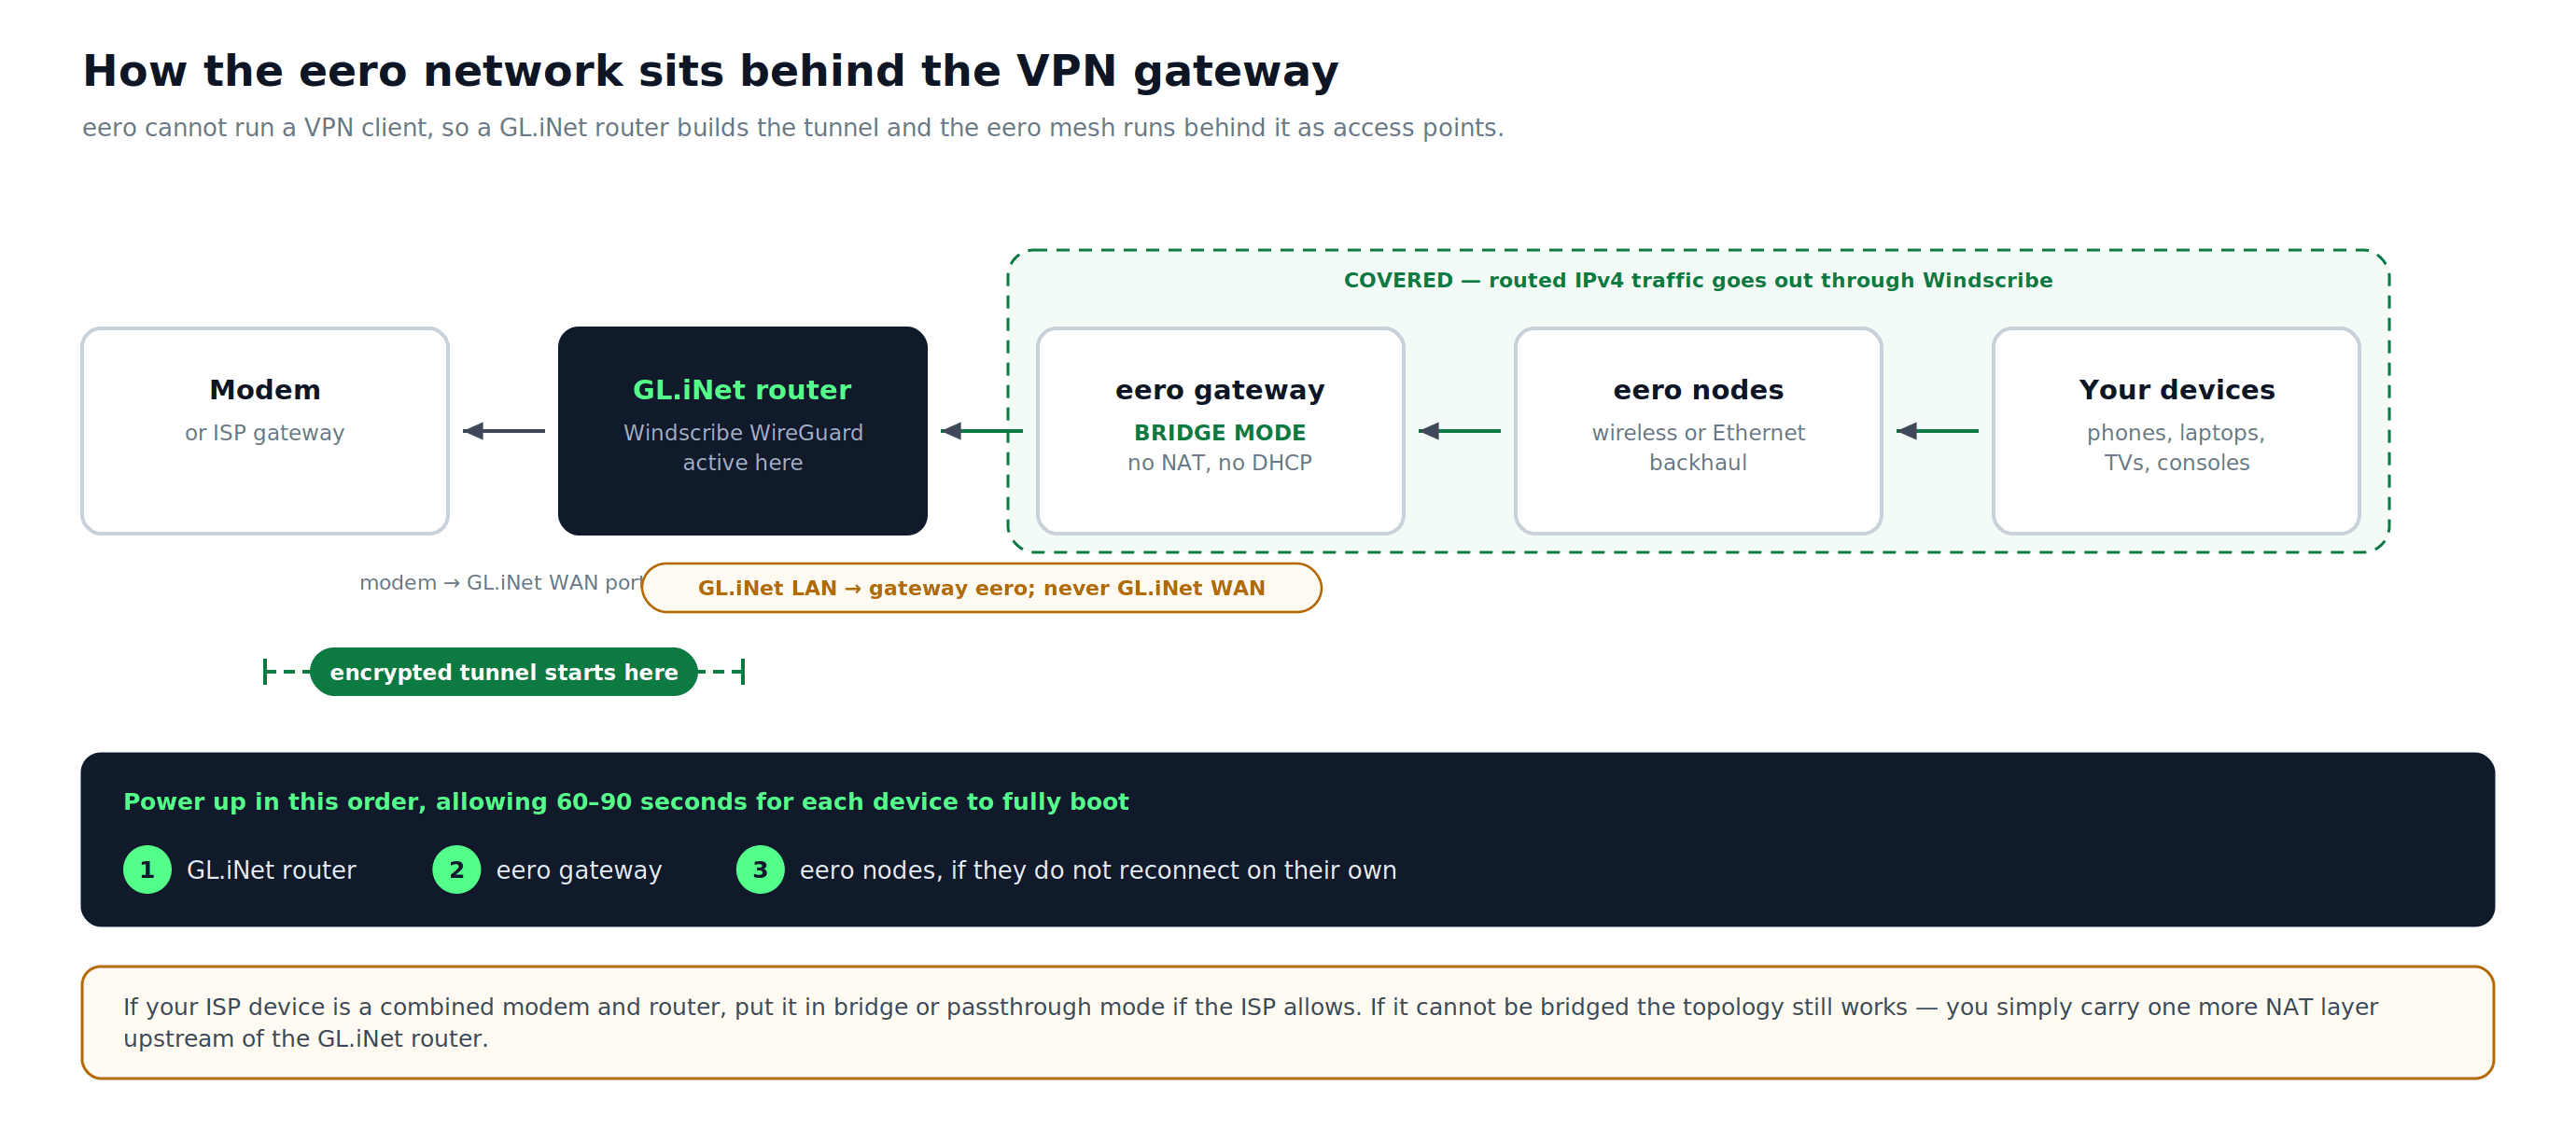
Figure 1: The full topology — the GL.iNet router builds the tunnel, the eero mesh runs behind it in bridge mode, and the gateway eero connects to a GL.iNet LAN port, never the GL.iNet WAN port.
What You Need
- A paid Windscribe account: Pro, or Build-A-Plan with the desired paid location included. Manual WireGuard config generation is not available on free accounts.
- A GL.iNet router with WireGuard support (e.g., GL-MT3000 “Beryl AX,” GL-AXT1800 “Slate AX,” or GL-MT6000 “Flint 2”)
- A computer or phone to access the GL.iNet admin panel
- The eero app (iOS or Android) installed and logged in to your eero account
- Two Ethernet cables (modem-to-GL.iNet WAN port, GL.iNet LAN port-to-gateway eero)
Step 1: Generate a WireGuard Config File from Windscribe
- Log in to your account at windscribe.com.
- Open the Config Generator tab in My Account and select WireGuard.
- Configure the following settings:
- Location: Choose your preferred country and city.
- Port: 443 UDP (use this port if you are unsure which to choose).
- Key Pair: Select New Key Pair unless you have an existing key pair you want to reuse.
- Click Download Config.
- Save the
.conffile to your computer. This file contains your private key, the server’s public key, the assigned IP, and the DNS server address. Keep it secure.
Note on R.O.B.E.R.T.: Your Windscribe account-level R.O.B.E.R.T. settings (ad blocking, malware filtering) apply when Windscribe’s DNS servers are active. Because the WireGuard config file points DNS queries to Windscribe’s resolvers by default, R.O.B.E.R.T. filtering is active for all devices on the eero network once the tunnel is connected, as long as GL.iNet is using the DNS value from the Windscribe config and no custom DNS override is set on the router.
Step 2: Set Up WireGuard on the GL.iNet Router
2a. Access the GL.iNet Admin Panel
- Connect the GL.iNet router to your computer via Ethernet or connect to its default Wi-Fi network (the SSID and Wi-Fi password are printed on the router’s label).
- Open a browser and go to
192.168.8.1. - Log in with the admin password you created during initial GL.iNet setup. If this is a first-time setup, follow the on-screen prompts to create one.
2b. Upload the Windscribe Config
- In the GL.iNet admin panel, go to VPN > WireGuard Client.
- Click Add Manually.
- Select the upload area and choose the
.conffile downloaded from Windscribe in Step 1.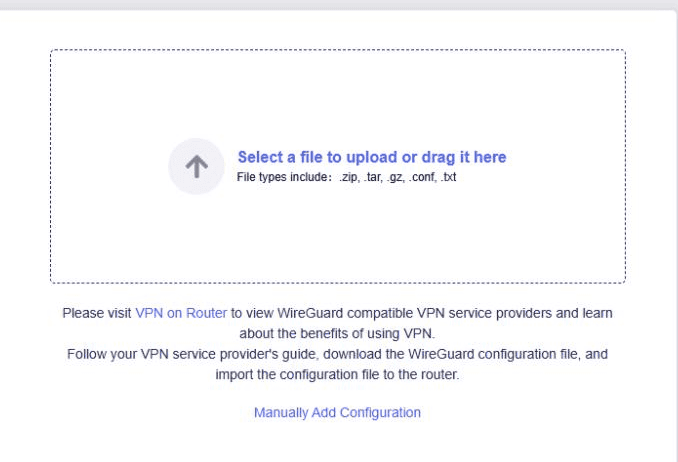
Figure 2: The upload panel in GL.iNet’s WireGuard Client. Windscribe’s
.confis one of the accepted file types. Screenshot: GL.iNet. - Name the group/profile descriptively (e.g.,
Windscribe-Canada-443) so server locations are easy to distinguish when you have multiple configs. - Click Apply.
Built-in Windscribe option: Current GL.iNet firmware also includes a built-in Windscribe setup path under VPN > WireGuard Client > Windscribe. It asks for the same username and password you use to sign in to Windscribe, then lets you select servers. The manual config path above avoids entering your Windscribe account password into the router.
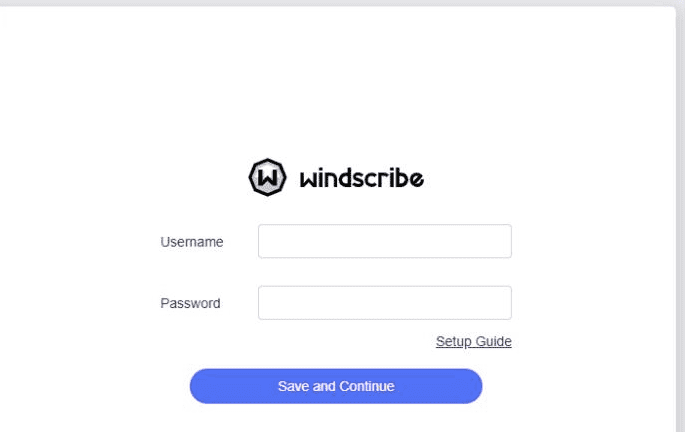
Figure 3: The built-in Windscribe sign-in step asks for your Windscribe username and password. The manual config path above avoids entering them into the router. Screenshot: GL.iNet.
2c. Connect the Tunnel
- Under WireGuard Client, locate the Windscribe profile you just added.
- Click the three-dot icon beside the profile and choose Start.
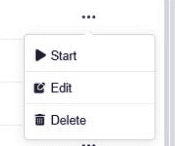
Figure 4: The three-dot menu beside a profile. Screenshot: GL.iNet.
- Once connected, GL.iNet displays a green dot next to the profile name. Open the VPN Dashboard if you want to view the connection details.
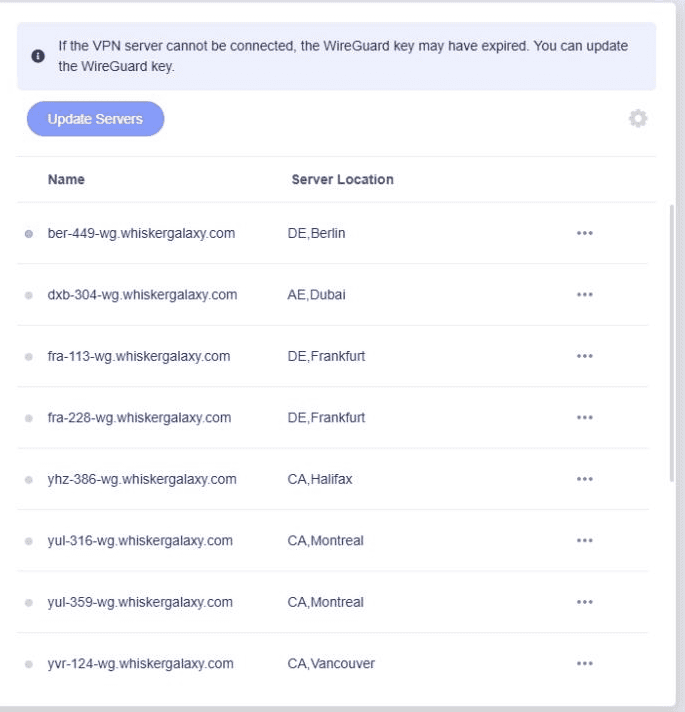
Figure 5: GL.iNet uses a green dot to mark the connected profile; the hostnames shown are Windscribe WireGuard endpoints. Screenshot: GL.iNet.
- To confirm the tunnel is active, open ipleak.net on a device connected to the GL.iNet router’s Wi-Fi. The IP address shown should be a Windscribe exit IP, not your real ISP-assigned IP. The location the test page assigns to that IP may not match the exact city you selected, as geolocation databases are imprecise.
Step 3: Set eero to Bridge Mode
Before rewiring: Keep your existing eero network online long enough to change the DHCP & NAT setting in the eero app. After bridge mode is saved, power everything down and rewire using the topology at the top of this guide.
By default, the gateway eero performs its own NAT and DHCP. Placing it behind the GL.iNet router without any change causes double NAT, which can degrade performance and interfere with certain applications. Bridge mode resolves the extra NAT layer between the GL.iNet router and the eero network.
3a. Enable Bridge Mode in the eero App
- Open the eero app.
- Tap the Settings tab.
- Tap Advanced networking, then under Network services tap DHCP & NAT.
- Change the mode from Automatic to Bridge.
- Tap Save. Bridge mode disables several eero advanced networking and eero Plus features: Advanced Security, Ad Blocking, Content Filters, historical data usage, and Hotspot Backup. Basic Wi-Fi and mesh coverage continue to work. See eero’s bridge-mode article for the current list. Confirm to proceed.
In bridge mode, the GL.iNet router handles DHCP and downstream routing/NAT for the eero network. The eero units continue to function as access points, distributing Wi-Fi across the mesh.
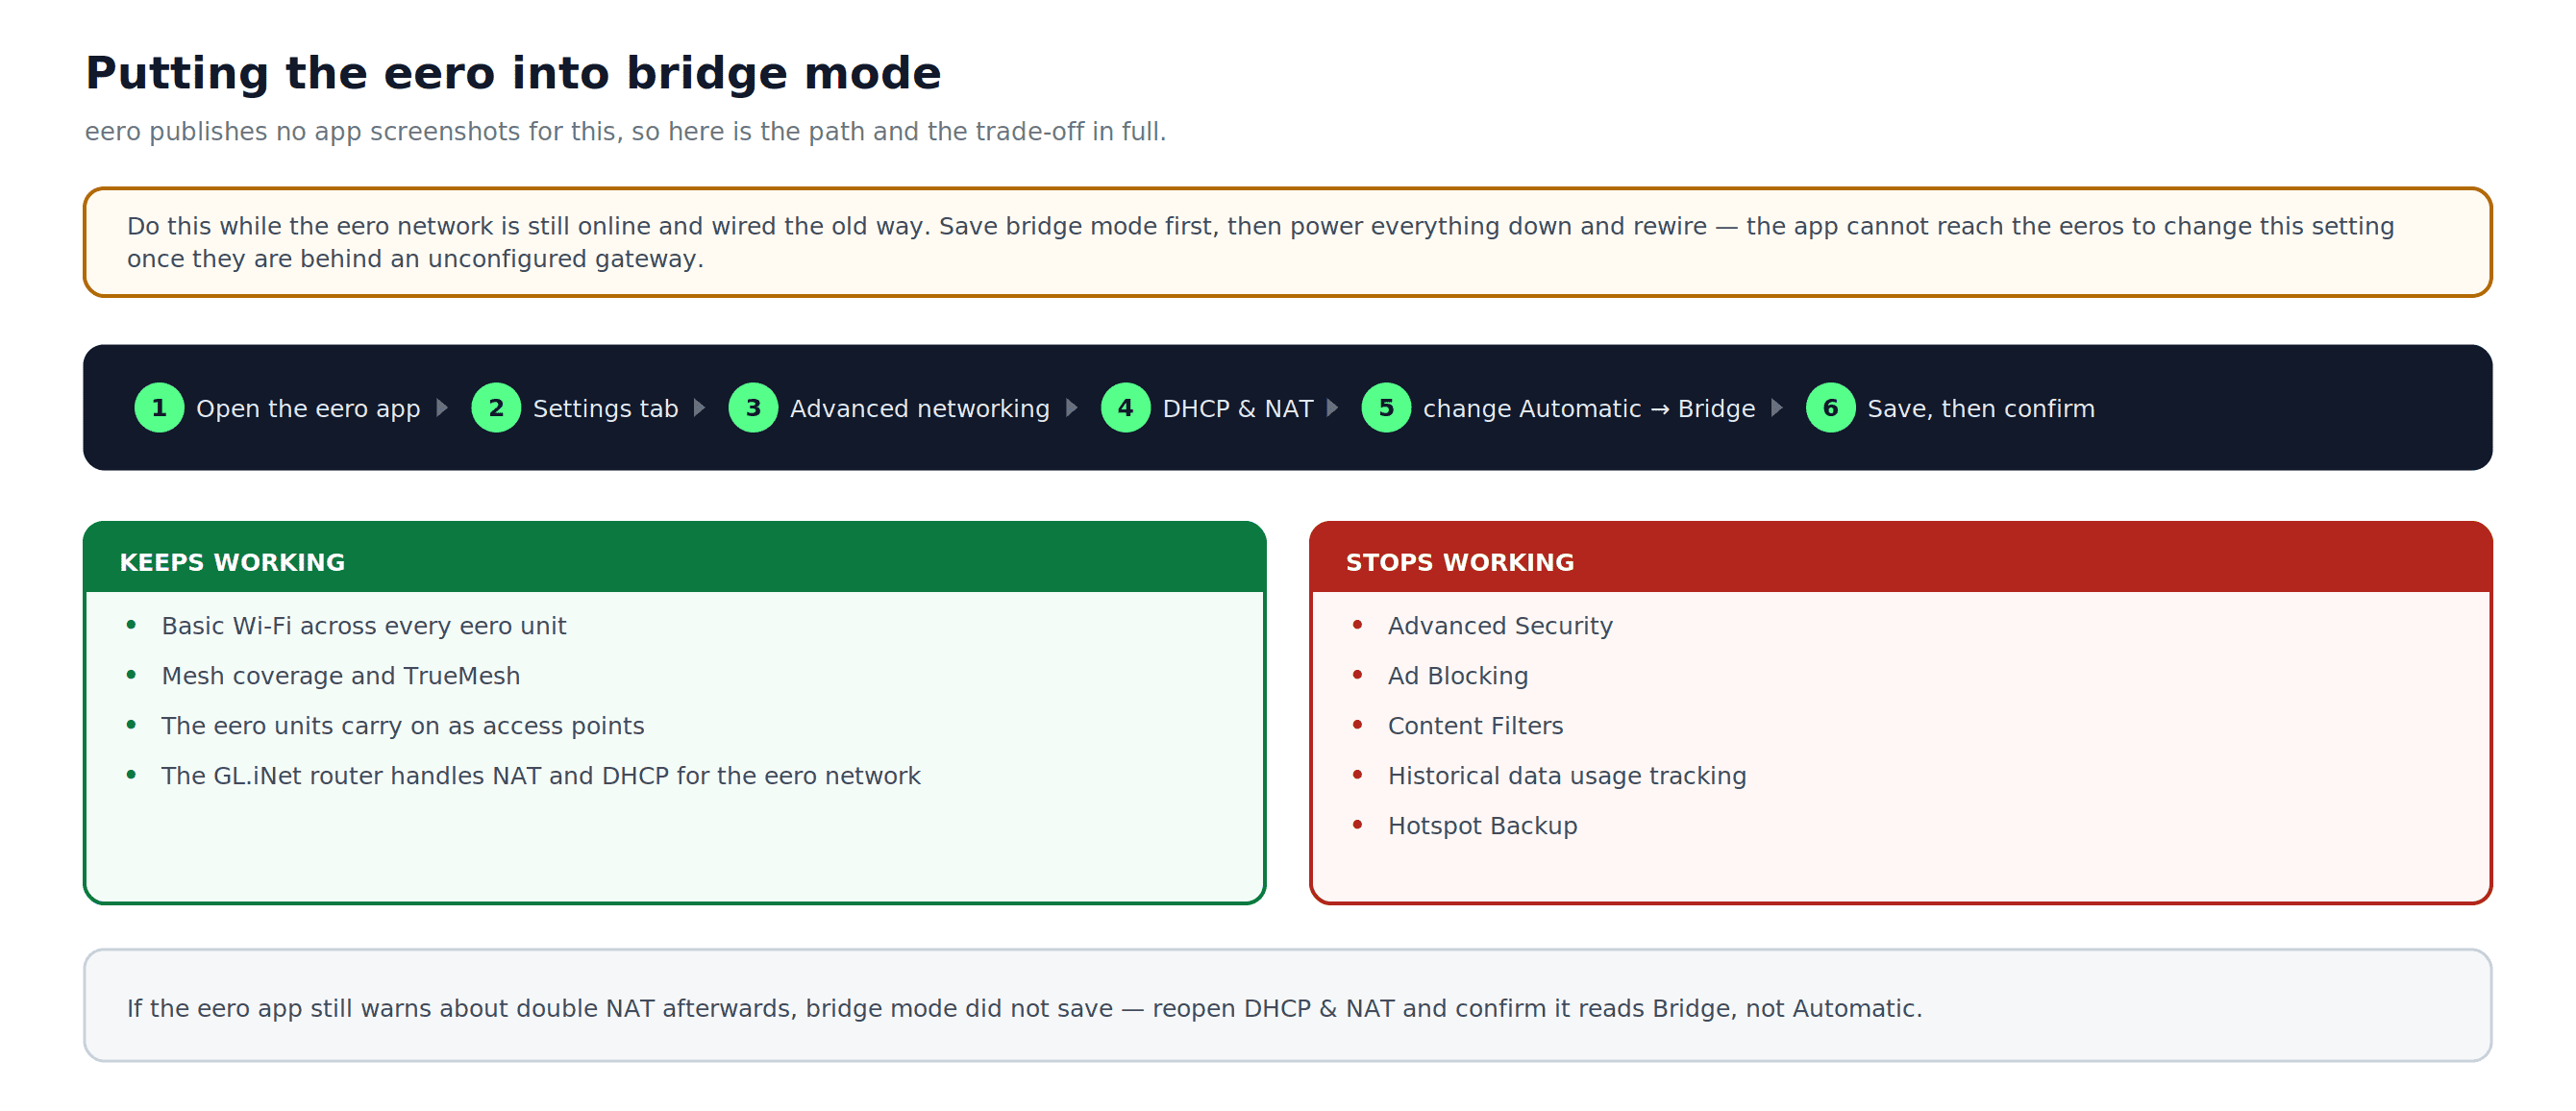
Figure 6: The bridge mode path in the eero app, what survives the change, and what stops working.
3b. Connect the eero Gateway to the GL.iNet Router
- Connect one Ethernet port on the gateway eero to a LAN port on the GL.iNet router.
- Do not connect the eero to the GL.iNet WAN port; it must connect to a GL.iNet LAN port.
- eero nodes (satellite units) connect to the gateway eero as they normally would, via wireless backhaul or Ethernet backhaul depending on your setup.
Power cycle the GL.iNet router, then the gateway eero, then any eero nodes (if they do not automatically reconnect). Allow 60 to 90 seconds for each device to fully boot.
Step 4: Verify the Full Setup
With all devices connected and the WireGuard tunnel active on the GL.iNet router:
- Connect a phone or laptop to your eero Wi-Fi network (not to the GL.iNet Wi-Fi directly).
- Navigate to ipleak.net or browserleaks.com/ip.
- Confirm the following:
- The IP address shows a Windscribe exit IP, not your ISP’s IP. The location the test page assigns to that IP may not match the exact city you selected.
- The DNS section shows Windscribe’s DNS resolvers, not your ISP’s DNS servers. A DNS leak means DNS queries are not using Windscribe’s DNS, even if the IP tunnel itself is active.
- Check IPv6 separately. If the test page shows an IPv6 address belonging to your ISP, your IPv6 traffic is not going through the Windscribe tunnel. Disable IPv6 on the GL.iNet router (under Network > IPv6) and retest before treating the setup as leak-free.
If the IP address still shows your real ISP-assigned IP, see the Troubleshooting section below.
Windscribe Feature Availability at the Router Level
- IP masking for all eero devices: Active for routed IPv4 traffic from eero-connected devices as long as the WireGuard tunnel is connected and leak tests pass.
- R.O.B.E.R.T. (DNS-level ad and malware blocking): Active at the network level when Windscribe’s DNS is in use via the WireGuard config. Configure your R.O.B.E.R.T. preferences on the Blocking Categories and Custom Rules pages under Security in My Account. Confirm no custom DNS override is set on the GL.iNet router.
- Static IP: Works on paid accounts with a Static IP add-on. For Build-A-Plan, Static IP eligibility requires the Unlimited Bandwidth and R.O.B.E.R.T. add-on. Generate the Static IP WireGuard config from the config generator and upload it as a separate profile.
- Split Tunneling (per-device or per-app): Not available at the router level. It requires the Windscribe desktop or mobile app on each device.
- Kill switch: On GL.iNet firmware 4.7 or earlier, enable Block Non-VPN Traffic (also called Kill Switch on some versions) under VPN > VPN Dashboard > VPN Client > Global Options. Firmware 4.8 or later enables a per-tunnel Kill Switch when the tunnel is active and offers a separate Enhanced Kill Switch in Policy Mode. Confirm the option for your firmware and verify its behavior with a leak test after disconnecting and reconnecting.
- Port forwarding: Not covered by this WireGuard router setup. Permanent port forwarding requires a Static IP. Ephemeral port forwarding is Pro-only and configured on the Port Forwarding tab in My Account, but whether it functions through a router-level WireGuard setup depends on your specific configuration. Do not assume this setup handles port forwarding.
Switching Windscribe Server Locations
- Log in to windscribe.com and generate a new WireGuard config for the desired server location following Step 1.
- In the GL.iNet admin panel, go to VPN > WireGuard Client.
- Click Disconnect on the active Windscribe profile.
- Upload the new config file and name it accordingly.
- Click the three-dot icon beside the new profile and choose Start.
You can store multiple Windscribe configs in the GL.iNet panel (one per server location) and switch between them without re-downloading files each time.
Troubleshooting
All eero-connected devices show my real IP address
- Confirm the WireGuard profile in GL.iNet shows a green connected indicator.
- Verify the Ethernet cable from the gateway eero connects to a GL.iNet LAN port, not the GL.iNet WAN port.
- Reboot the GL.iNet router and wait 30 seconds, then reboot the gateway eero.
eero app shows “No internet connection” after enabling bridge mode
- Ensure the GL.iNet router is fully booted and has an active internet connection before powering the gateway eero.
- Confirm the Ethernet cable runs from a GL.iNet LAN port to the gateway eero, not to the GL.iNet WAN port.
- If the eero app still shows no connection, toggle bridge mode off, reboot both devices, and re-enable bridge mode once connectivity is restored.
DNS leak detected at ipleak.net
- Open the
.conffile in a text editor and locate theDNS =line. Confirm it matches the DNS address specified in your generated Windscribe config. - In the GL.iNet admin panel, go to Network > DNS and confirm no custom DNS setting is overriding the WireGuard tunnel’s DNS.
IPv6 leak detected
- If an IPv6 test shows your ISP’s IPv6 address, go to Network > IPv6 in the GL.iNet admin panel and disable IPv6.
- Retest at ipleak.net to confirm no IPv6 address from your ISP appears.
WireGuard connection drops intermittently
- Use Update Servers in the GL.iNet WireGuard Client to refresh the available server list.
- Try switching to a different Windscribe server location, or regenerate the config using another UDP port offered by the Windscribe WireGuard generator.
- Check for GL.iNet firmware updates under System > Upgrade.
Double NAT warning persists in the eero app
- Bridge mode may not have saved correctly. Repeat Step 3a and confirm the mode shows Bridge, not Automatic.
- After saving, force-close and reopen the eero app to refresh the status. Remember that an unbridged ISP modem/router can still create a separate upstream NAT layer.
Frequently Asked Questions
Can I run Windscribe directly on an eero router?


Which Windscribe plan do I need to generate a WireGuard config?
Does putting eero in bridge mode affect my Wi-Fi coverage?
Will all devices on my eero network be protected?
How many devices can I connect through this setup?
Can I still use Windscribe app features when connected at the router level?
What happens if the WireGuard tunnel drops?
Windscribe Plans & Resources
To use this setup, you need a paid Windscribe account. Two options are available:
- Pro: Includes unlimited bandwidth, access to all Pro locations, full R.O.B.E.R.T. access, and Pro-only features like ephemeral port forwarding.
- Build-A-Plan: Starts at $3/month and lets you pay only for selected Pro locations. WireGuard configs are available only for locations included in your plan. A Static IP add-on is available on eligible plans.
Check the Windscribe upgrade page for current pricing on both plans.
Once your account is active, use the links below to complete setup or get help: